Q: "I know that I can still stream quality music on Spotify free version and so wish to cancel Spotify subscription. More so, it's high time I get a feel of what other streaming services are. How do I go about this?"
Spotify is still the poster-child, a host for over 210 million Premium subscribers. However, some users will want to try other services because of the variety, such as Apple Music, Tidal, etc. And how to cancel Spotify Premium is now the bone of contention for such users. Follow us on ways to cancel Spotify Premium subscription on all devices.
Part 1. How to Cancel Spotify Premium on Desktop
If you're using Spotify on your desktop, canceling your Premium membership is easy. Here's how to get Spotify cancel Premium on Windows and Mac computers.
How to Cancel Premium Spotify on Windows
Step 1. Open your browser then type the Spotify's website on the address bar.
Step 2. Just enter your username and password to log in. Then tap the "Account" button in the upper right corner.
Step 3. Here, find and click on the "Account Overview" section.
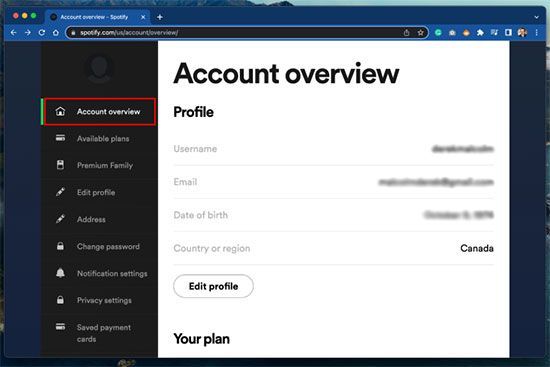
Step 4. Then find the "Available Plans" option on the left side of the screen.
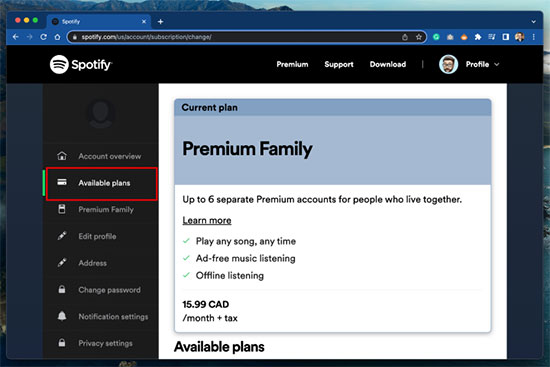
Step 5. Likewise, check out the box that contains your membership information. These include the data that your plan should be renewed.
Step 6. Next, go to the bottom of the page and look for the Spotify Free label option. From there, click the "Cancel Premium" button.
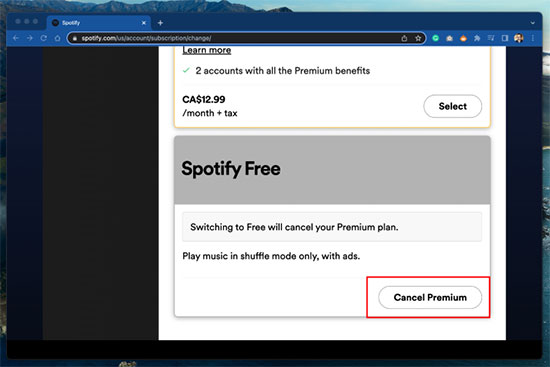
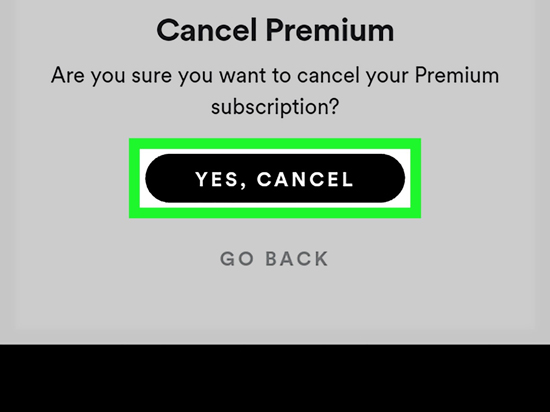
Step 7. Finally, click on the "Yes, Cancel" tab to confirm that you want to cancel subscription Spotify on your Windows.
How to Cancel a Spotify Subscription on Mac

Step 1. Go to the Spotify Web Player, then click the "Login" option and enter your Spotify account information.
Step 2. Your account will be visible from the drop-down menu. Click on "Account".
Step 3. Then check the left side of the menu and choose the "Account Overview" option.
Step 4. Next, click on the "Available Plans" and "Cancel Premium" option.
Step 5. Follow the on-screen instructions to cancel Spotify membership.
Part 2. How to Cancel Spotify Subscription on Mobile
For the steps on how to unsubscribe from Spotify mobile, it will vary slightly depending on whether you're using an Android or iOS device. Read on to learn the detailed steps.
How to Cancel Spotify Premium on Android
Step 1. You can use any browser such as Chrome, Firefox, Mozilla, among others. Start by opening the browser.
Step 2. Then go to the address bar and type "spotify.com/account".
Step 3. Next, log in to your Spotify account by entering your email address and password. After that, tap the "Login" selection.
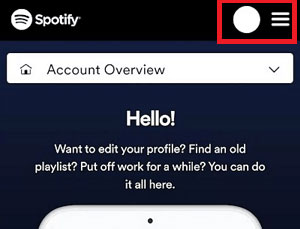
Step 4. Then tap the "Your Plan" located at the left sidebar of the page. You should see your payment and subscription information here.
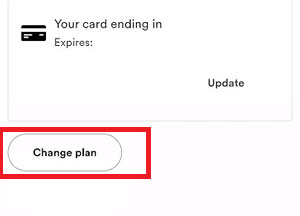
Step 5. Just click the "Change Plan" > "Cancel Premium" button.
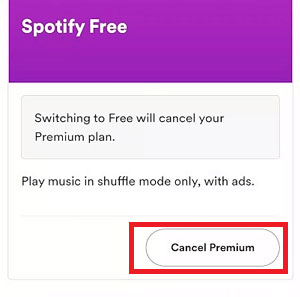
Step 6. Wait for a confirmation from Spotify, and tap the "Yes, Cancel" option to unsubscribe to Spotify subscription on Android.
How to Unsubscribe Spotify Premium on iPhone
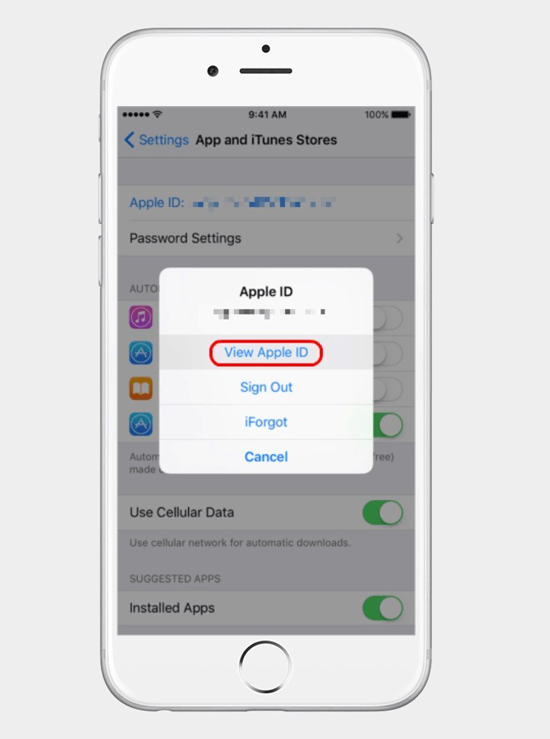
Step 1. Go to the "Settings" app on your iPhone's home screen and open it.
Step 2. Then tap the "iTunes & Apple Store" option > "Apple ID Section" for a prompt box. This is where you should enter your Apple ID password.
Step 3. Go to the Apple ID page and scroll down to the "Subscriptions" section.
Step 4. Check out your "Spotify" subscription from the provided list.
Step 5. Lastly, tap the "Cancel Subscription" option to enable Spotify cancel subscription.
Part 3. How to Cancel Spotify Premium Free Trial
If you're using Spotify free trial of Premium, you'll need to cancel your subscription before the trial period ends to avoid being charged. Here's how to cancel Spotify free trial.
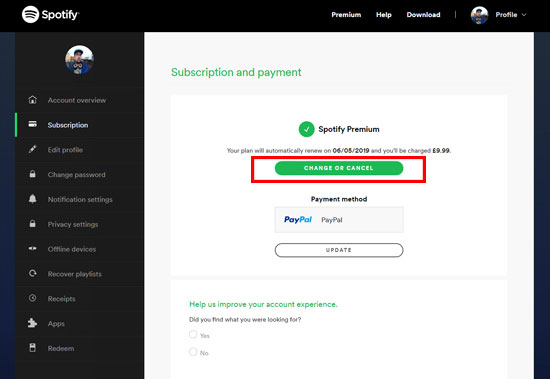
Step 1. Go to the Spotify website and click on the "Log in" option.
Step 2. Open the drop-down menu on the top right and select the "Account" section.
Step 3. Click on "Your Plan" > "Change Plan" option.
Step 4. Tap "Spotify Free" and select the "Cancel Premium" option.
Step 5. You will also be asked the reason for canceling your subscription, provide your reason and click on the "Submit" button.
Step 6. After the free trial of Spotify Premium, you will not be charged any fees.
Part 4. How to Cancel Premium on Spotify via Third Party Services
If you signed up for Spotify Premium through a third-party service such as a mobile carrier like AT&T or Verizon, you'll need to cancel your subscription through that service. Here's how to do it.
Step 1. Sign in to the third-party app where you signed up for Spotify Premium.
Step 2. Find the streaming services menu, which may vary in each app.
Step 3. Select the "Spotify" entry and click "Cancel subscription".
Step 4. You can also consult your carrier's customer service directly to have Spotify Premium cancel.
Part 5. How to Keep Spotify Music Forever after Canceling Spotify Premium
Most users cancel their Spotify Premium account when they wish to close their Spotify accounts. This is also equivalent to deleting the playlists you downloaded for offline listening. Once you're not a Spotify Premium subscriber, you won't be able to take advantage of the various exclusive perks. But wait! You can still keep Spotify music forever even after canceling Spotify Premium.
The secret lies in the best AudFree Spotify Music Converter. This tool allows you to download and convert Spotify music to various formats like MP3, AAC, WAV, FLAC and more. You will get Spotify local downloads without any quality loss. In turn, you can keep the downloaded Spotify music forever without Spotify Premium.
AudFree Spotify Music Converter

- Download Spotify songs, playlists, podcasts locally
- Convert Spotify music to MP3, FLAC, AAC, WAV, M4A, M4B
- Keep Spotify music forever without Spotify Premium
- Original audio quality and all ID3 tags are preserved
How to Keep Spotify Music Forever without Spotify Premium
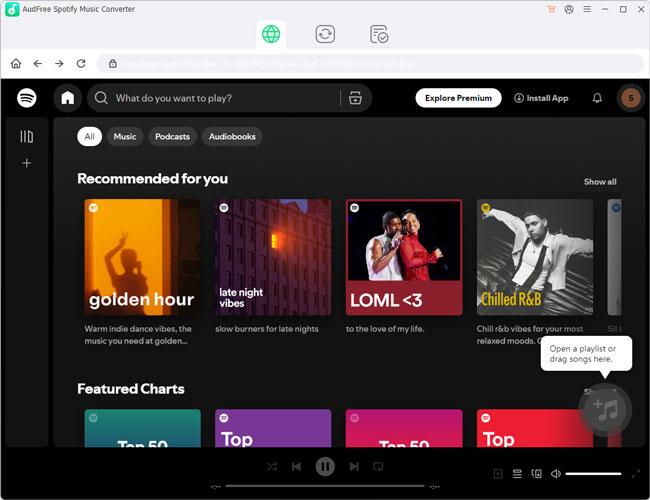
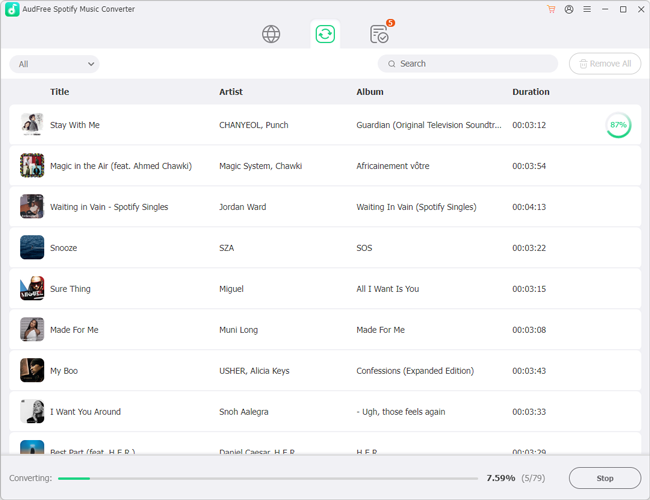
Step 1. Open the AudFree Spotify Music Converter on your computer and it opens the Spotify app immediately. Go to the Spotify library to get your favorite songs. You can drag and drop them to the interface window. Or copy the song links and paste them to the search bar, then press the Add icon.
Step 2. Click the Menu bar > Preferences > Convert. Here, you can change the output format to MP3, and customize other preferences for Spotify playlist like bit rate, sample rate, and many others.
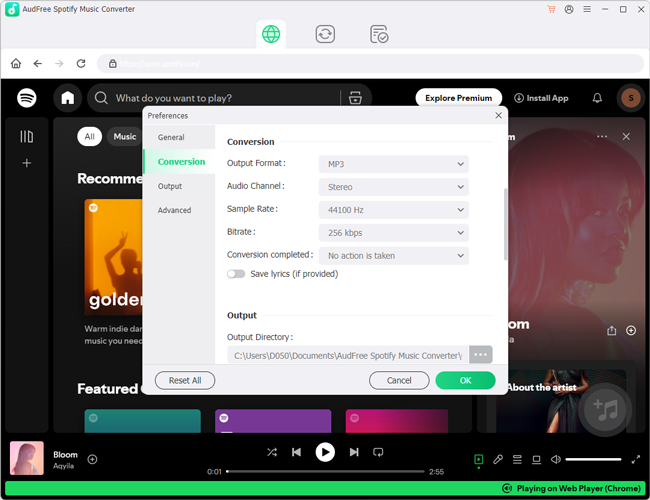
Step 3. Ensure your preferences are correct, then hit the Convert button to download Spotify songs without Spotify Premium. They'll then be saved to the Converted folder where you can retrieve them and listen to them offline even after canceling your Spotify Premium subscription.
Part 6. FAQs of Canceling Spotify Premium
Q1: What Happens When I Cancel Spotify Premium?
When you cancel cancel Premium Spotify, you will lose access to the Premium features such as ad-free listening, offline playback, and high-quality audio. But with AudFree Spotify Music Converter, you can get Spotify Premium for free to enjoy all the features.
Q2: Can I Cancel My Spotify Premium Subscription at Any Time?
Yes, you can cancel Spotify subscription at any time.
Q3: Can I Still Use Spotify after Canceling Premium?
Yes, you can still use Spotify after canceling Premium only if you don't delete Spotify accounts. You will have access to the free version of Spotify which has some limitations such as ads and lower quality audio.
Q4: Will I Lose My Playlists If I Cancel Premium on Spotify?
No, you will not lose all your music if you cancel Spotify Premium. Your playlists and songs will still be available on the free version of Spotify.
Q5: Why Am I Cancelled Spotify Premium but Still Being Charged?
It's possible that you were still being charged because the cancellation process was not completed successfully. You can check your account settings to confirm if the cancellation went through or contact Spotify customer support for further assistance.
Part 7. In Conclusion
Now the trick to cancel Spotify subscription on desktop or mobile devices is at your fingertips. And all is not lost. Remember, with AudFree Spotify Music Converter, you can still enjoy your favorite Spotify songs on your computer offline, even after ending your Spotify Premium. Then take action whatever your purpose is.

Charles Davis
Chief Editor


