Spotify has already released an official music metadata editor called Line-In in May 2018, allowing users to edit Spotify music metadata, like genre, label, tags, mood, etc. Less than three months later, Spotify posted the decision to shut down Line-In on its community. This is the reason why you can't edit song info in Spotify anymore.
Is there any other way to edit Spotify info other than waiting for it to come back? Fortunately, the answer could be positive. In this article, we will explore how to edit Spotify playlist and song to enhance your music streaming experience.
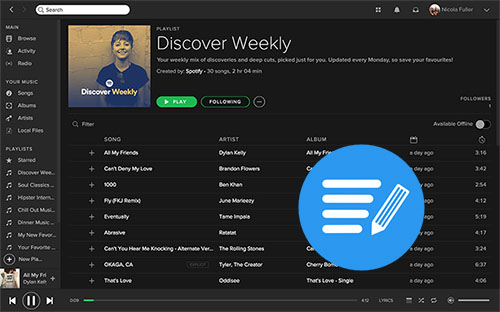
Part 1. How to Edit Songs on Spotify
Although there is no official Line-In feature of songs for editing on Spotify, there are still some other effective and professional tools to fix it out. Here, we can meet the third-party software for Spotify, namely AudFree Spotify Music Converter. It's specially designed for downloading, converting as well as editing Spotify songs, playlists and other popular content with ease.
If you'd like to customize listening audio quality of Spotify music, such as changing bit rate, sample rate, you can directly use AudFree Spotify Music Converter to achieve it. You can get help from this software to download Spotify songs offline to your computer locally without premium. After downloading, you can use free audio editors like iTunes to freely edit downloaded Spotify music information like ID3 tags.
How to Download Spotify Music for Free Editing
First, let's start to use AudFree Spotify Song Editor to enhance audio quality as you like. By the way, if you need to edit other Spotify music info, you still need to refer to the following steps to download Spotify music and playlists offline in advance. Good news is that this tool is also available for free Spotify users. You don't need to subscribe Spotify Premium for downloading Spotify files.
- Step 1Load Spotify music and playlists
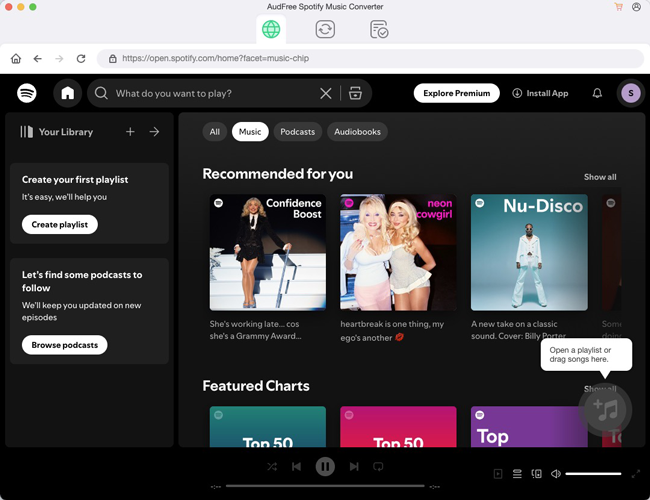
- There are two ways for you to import Spotify songs to AudFree software. One is to drag songs from Spotify app and drop them to the main interface of AudFree SpoDable. The other is to copy the URL of Spotify songs or playlists and paste it to the search box and click '+' button to load them.
- Step 2Edit Spotify music output quality
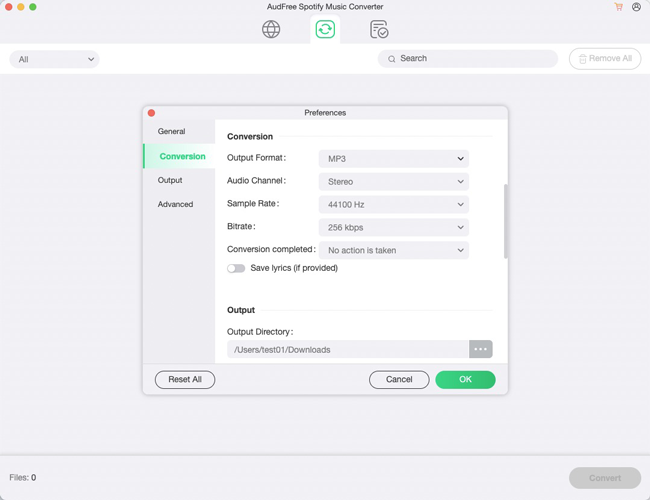
- To activate the setting feature, please go to the 'Preferences' option from the top 'Menu' bar and choose 'Convert' section to launch setting window, in which you can define output format as MP3, FLAC, WAV, AAC, M4A and M4B and customize bit rate as 320 kbps and sample rate as 48,000 Hz to edit Spotify music quality.
- Step 3Download Spotify music as common audio files
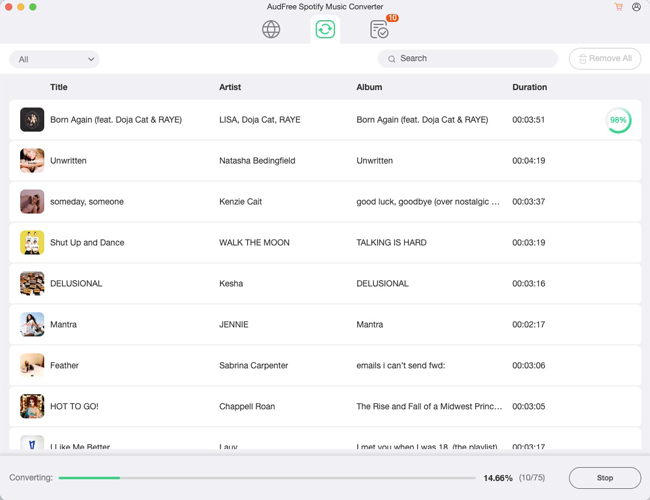
- To apply for all settings and download Spotify files offline, please simply hit on the 'Convert' button at the bottom-right corner of the main conversion window. And then all added Spotify songs will be downloaded and saved in destination folder on your computer. All of them can be transferred to iTunes audio editor for free editing.
How to Edit Spotify Song Info via iTunes
With the assistance of AudFree Spotify Music Converter, you can get Spotify files encoded in MP3 or other plain audio formats with high quality. Now we can start to edit song info Spotify in detail. There is no doubt that iTunes seems a good assistant. So here, we will show you how to edit Spotify music info with iTunes.
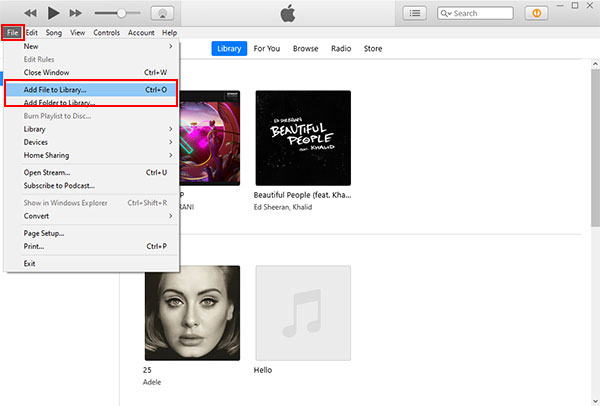
Step 1. When you launch iTunes app, please click the 'File' > 'Add File to Library' to transfer Spotify files to iTunes.
Step 2. Right click the item of imported Spotify songs and select 'Song Info' option to view the complete metadata.
Step 3. In the new window, you can start to customize ID3 tags, like title, artist, album, genre, year, etc. for editing.
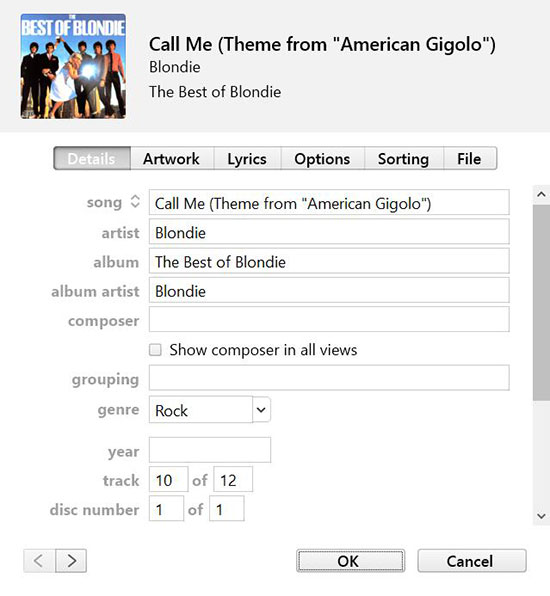
Step 4. When you're done editing Spotify songs, click the 'OK' button.
Part 2. How to Edit Spotify Playlist
Although you won't be able to edit Spotify song info because of the lack of Line-In feature, you can still edit Spotify playlists only if you have made a collaborative playlist on Spotify. Just need to create your own Spotify playlist and then you can edit the details of playlist on Spotify. Here we will show simple guides on how to add or remove songs from Spotify playlist, edit playlist information, and change the order of songs in a playlist.
How to Remove/Add Songs in Spotify Playlist
Step 1. Open the Spotify app and go to the playlist that you want to edit.
Step 2. Tap the "Search" button at the bottom of the screen.
Step 3. Type in the name of the song or artist that you want to add to the playlist.
Step 4. Once you find the song, tap the "three dots" next to the song title.
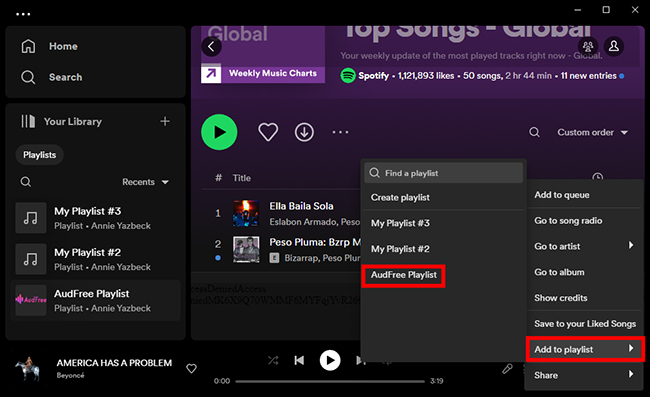
Step 5. Tap "Add to Playlist" and select the playlist that you want to add the song to.
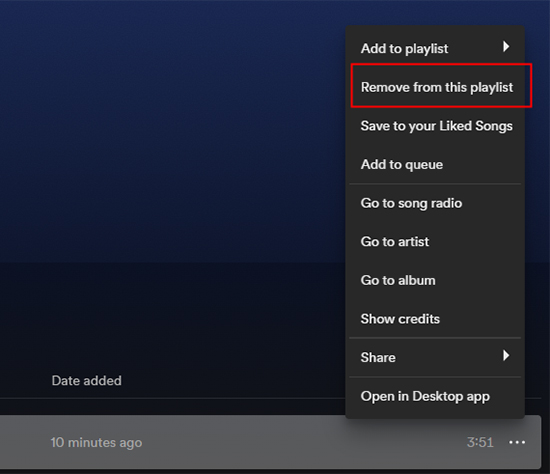
Step 6. To remove a song, find the song that you want to remove and click "three dots". Tap the "Remove from this Playlist" button that appears on the right side of the song title.
How to Edit Spotify Playlist Info
Step 1. Launch the Spotify app on your device and find the playlist you'd like to edit.
Step 2. Click on the "three dots" icon located at the top right corner of the playlist page.
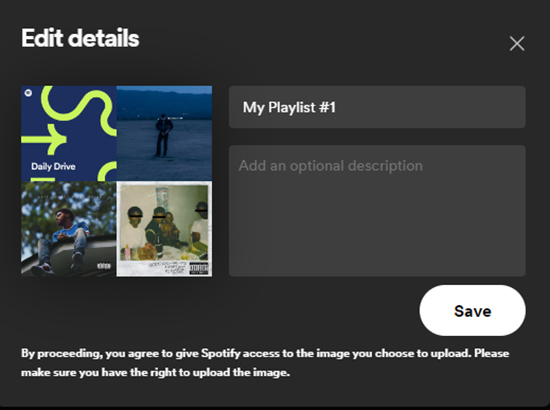
Step 3. From the dropdown menu, select "Edit details".
![]()
Step 4. To change the playlist title, simply click on the current title and type in the new title.
Step 5. To edit the playlist image, click on the current image and select a new one from your device's gallery or take a new photo.
Step 6. To edit the playlist description, scroll down to the "Description" section and click on it to make changes.
Step 7. Once you have made all the desired changes, click on "Save" in the bottom right corner of the page.
How to Edit Order of Songs in Spotify Playlist
Step 1. Open the Spotify desktop app and go to the playlist you want to change.
Step 2. Click "Custom Order" on the right to sort the songs in the playlist, the options are Title, Artist, Album, Date Added and Duration.
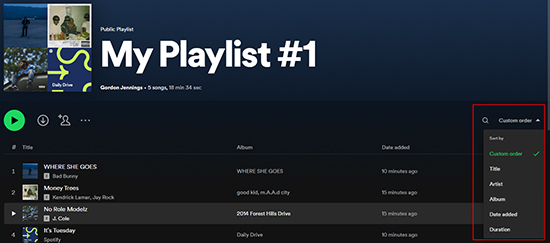
Step 3. To rearrange a song, simply tap and hold it until it lifts up, then drag it to its new position in the playlist.
Step 4. You can also move multiple songs at once by tapping and holding one song, then tapping on the other songs you want to move.
Part 3. How to Edit the Length of Songs on Spotify
If you'd like to cut or split Spotify music into smaller segments, you need to turn up to other audio editors, like Audacity. Make sure you've downloaded your local Spotify music using AudFree SpoDable first. Then we will walk you through the steps to cut music from Spotify via Audacity and create your own custom audio tracks to suit your needs.
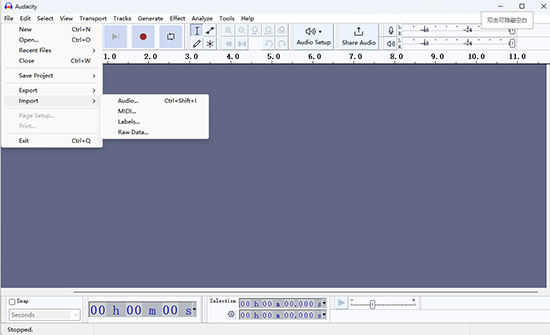
Step 1. Open Audacity on your computer, import the Spotify song you want to edit by clicking on "File" and selecting "Import" and then "Audio".
Step 2. Use the selection tool to highlight the part of the Spotify song you want to delete or cut.
Step 3. Click on "Edit" and select "Delete" or use the shortcut key "Ctrl + X" to cut the selected part.
Step 4. If you want to shorten the length of the Spotify song, simply select the part you want to keep and click on "Edit" and select "Copy" or use the shortcut key "Ctrl + C".
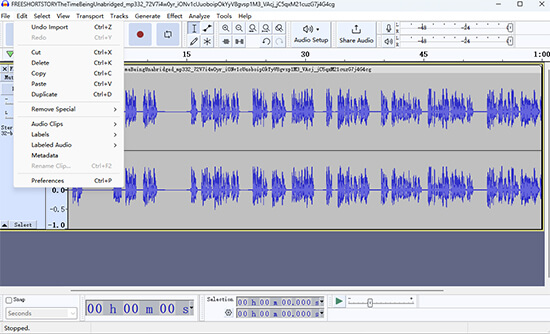
Step 5. Create a new project by clicking on "File" and selecting "New".
Step 6. Paste the copied part into the new project by clicking on "Edit" and selecting "Paste" or using the shortcut key "Ctrl + V".
Step 7. Export the edited Spotify song by clicking on "File" and selecting "Export". Choose the format you want to export and save it to your desired location.
View also: How to Record and Save Spotify Music with Audacity
Part 4. In Conclusion
Editing your Spotify playlists and songs can help you create a more personalized listening experience. With AudFree Spotify Music downloader, you can download and edit your favorite songs easily. Just follow the steps mentioned above to edit Spotify music as per your preference.

Charles Davis
Chief Editor


